There’s something special about the sound of a cassette, they produce this amazing warmth and warble as they pass the electromagnetic reader heads that amplify the electric signal.
Tapes can be used for much more than listening back to music in an old boombox or car stereo.
In fact, the cassette has been used to record and create music for quite a long time.
One of the most interesting uses of the cassette tape is the tape loop.
It’s a creative way to generate infinite, sprawling sounds that are completely analog and require no digital technology.
Let’s take a look at how tape loops work, how to make one of your own, and how to use them in your own music.
What is a tape loop?
A tape loop is a cassette tape that’s been modified to play in an infinite loop in either direction, instead of just forwards.
Tape loop cassettes don’t have a reel that ends when you get to the end of the tape, instead, the end of the tape reconnects back to the beginning of the tape to create a closed-loop.
What makes tape loops even more interesting is when you get variable tape speeds involved.
What makes tape loops even more interesting is when you get variable tape speeds involved.
By changing the speed at which the cassette is played you can make interesting adjustments to the pitch and create new off-kilter soundscapes.
How to make a tape loop
Making a tape loop is really easy and only takes about 15 minutes.
Here’s what you need to make a tape loop:
- A cassette tape that you’re willing to destroy
- Philips head screwdriver
- Tape
- Scissors
- Ruler
- Cassette player
Here’s a step-by-step guide to making your own tape loop.
Here’s a step-by-step guide to making your own tape loop.
Step 1: Make sure the cassette is fully rewound
The spool on the left-hand side of the A-side should be completely wound up.
Step 2: Remove each screw and open the cassette
Once you open up the cassette, get rid of the inner plastic film, you won’t need it for your tape loop.
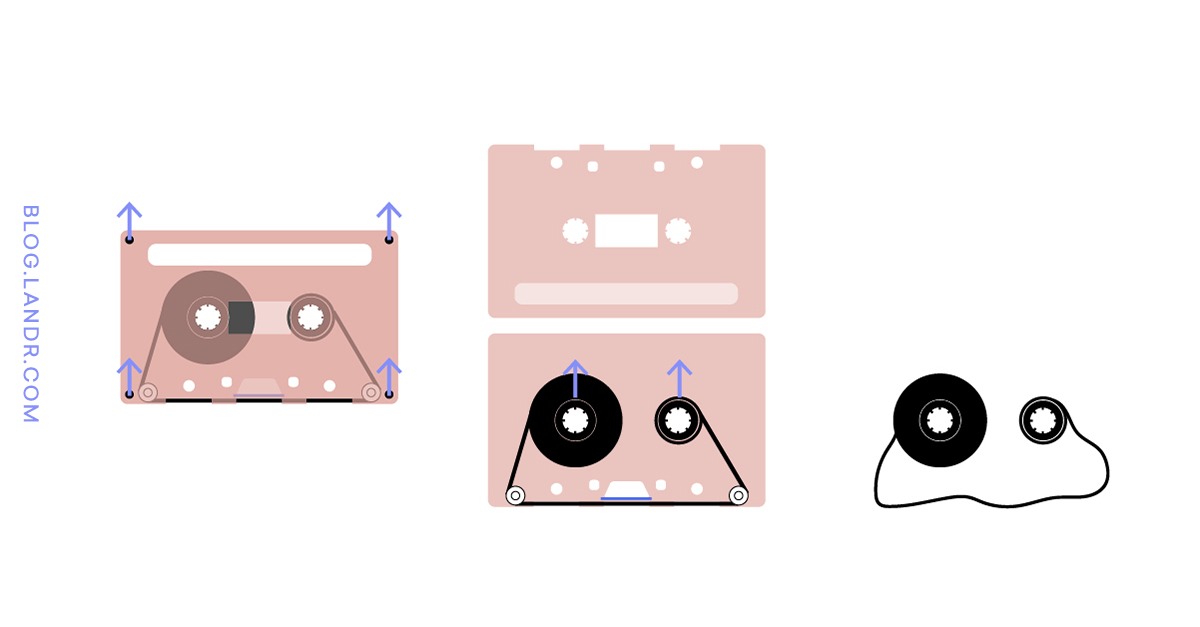
Step 3: Cut the tape from the smaller reel
Make sure to cut it as close to the small reel as possible.

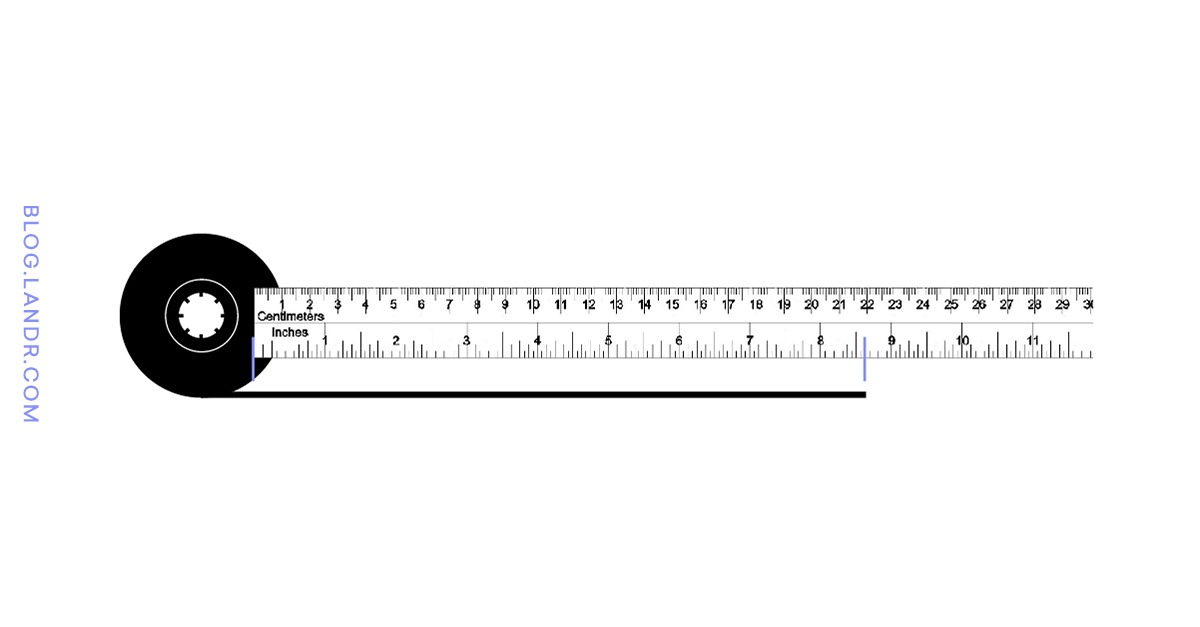
Step 4: Measure out an 8 5/8th inch section of tape
An 8 5/8 inch section is the required length to make a 5-second loop, it also will fit perfectly into the cassette.
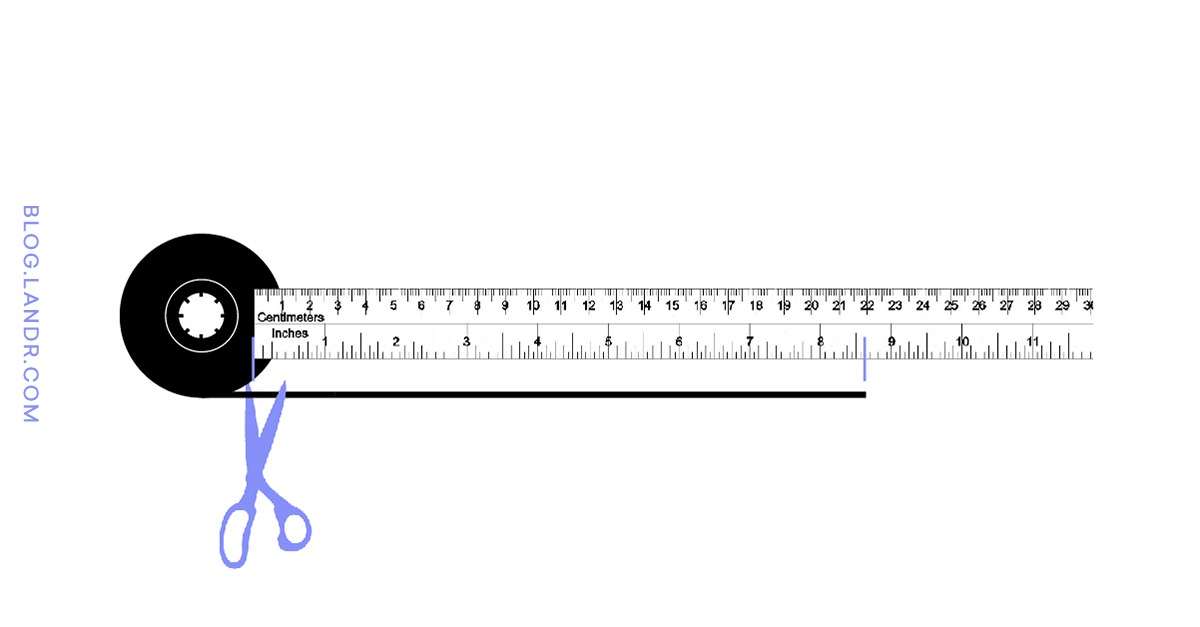
Step 5: Cut the tape at a 90-degree angle
Your cut should make the loop flush with the other end of the loop.
Step 6: With a narrow strip of tape, tape the loop together on the outside of the band
The outside part of the band won’t touch the player’s head, so it’s okay to have a piece of tape there.

Step 7: Place the loop back in the cassette around the guides at the bottom of the cassette
Make sure the loop sits properly in the guides or the player head won’t properly register the audio in the tape.
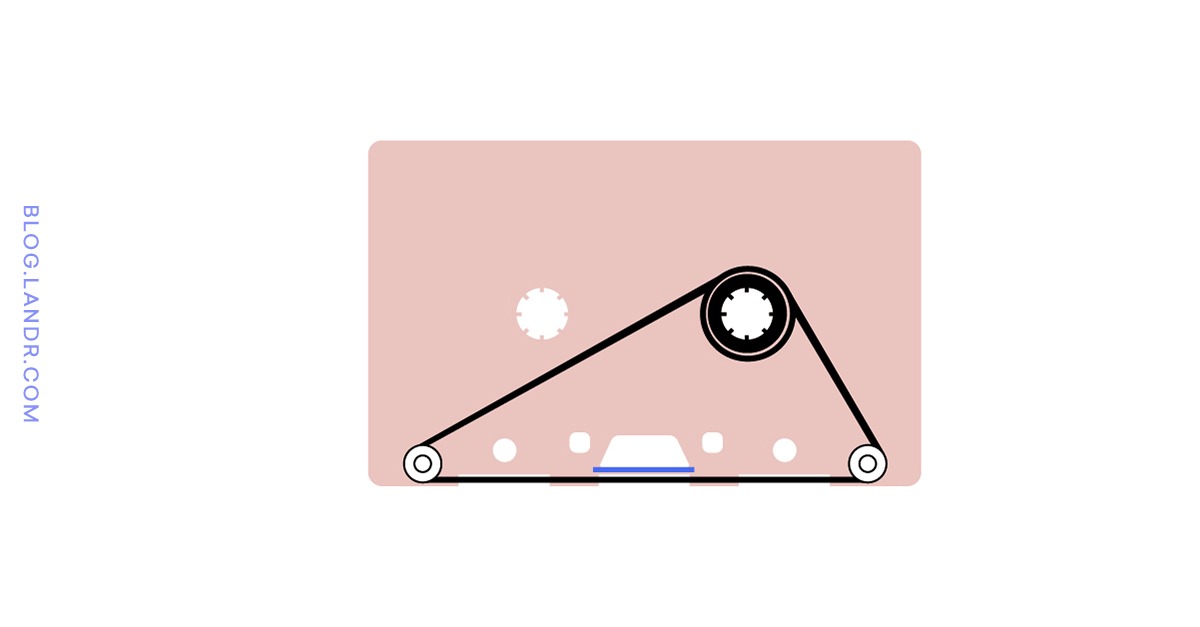
Step 8: Wrap the tape around the smaller reel and click it into place
Everything should fit snugly, but not too tight, you don’t want to pull too hard or you’ll risk pulling apart the taped section of the loop.
Once the loop sits correctly, put the screws back in and close up the cassette.
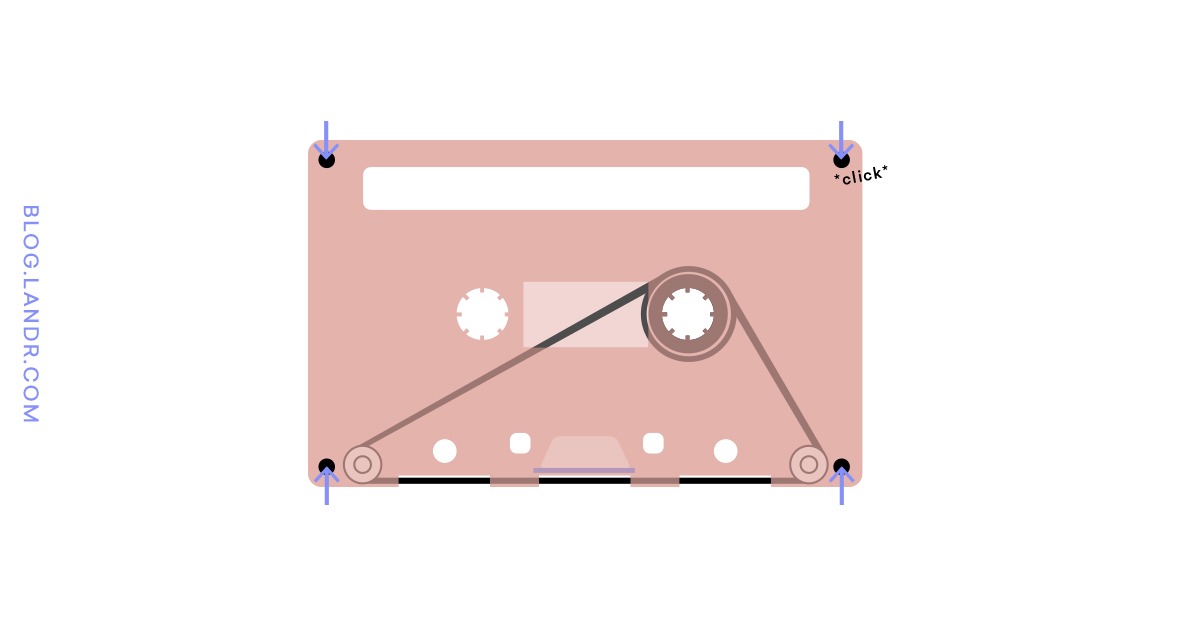
Step 9: Test the loop in your cassette player
Bingo! If it works, you are the proud owner of a new tape loop!

How to make music with tape loops
With the right section of tape, tape loops create these beautiful ambient textures that are perfect for adding effects to and playing with.
You can create interesting and authentic lo-fi beats with them, or you can use them to complement an ambient track.
AMULETS is one example of a great artist that uses tape loops to make moving ambient compositions.
Here’s a great video of him doing his thing with several different tapes looping on a four-track cassette player.
The perfect do-it-yourself project
Tape loops sound really cool and they’re pretty easy to make.
Tape loops sound really cool and they’re pretty easy to make.
It’s the perfect DIY project for a Sunday afternoon.
Next time you’re feeling uninspired, take some time to sit down and create a cool tape loop of your own.
You never know what you’ll end up creating!